
Every so often, a motif comes along that defines a season: the swallow a few years ago; the pineapple last year… Lately I’ve seen a whole lot of hot air balloons, from tattoos to centrepieces, and I have to admit, I’m smitten. There’s something about a hot air balloon that I find whimsical and almost other-worldly. In my infatuation, I spent a lot of time on Pinterest, which led me to discover these (be still my beating heart). I never really ‘got’ the steampunk thing, but these delicate light bulbs have certainly changed my mind. In keeping with the whimsicality that so draws me to hot air balloons, I decided to create a chandelier of decorated light bulbs, complete with fluffy clouds.
What you will need:

- Light bulbs (2 for £1 in Poundland!)
- Embroidery hoop
- Polyester filling (I used this – the sample weight was plenty)
- Bead caps (one per light bulb; mine sold out, for similar, try these)
- Black Gutta (I used this for a 3D effect, but Sharpies would also work well)
- Clear fishing line (I used this)
- Scissors
- Super glue
- Make sure your light bulbs are clean and dry. If they have stamps on them, as mine did, gently remove these with nail varnish remover-soaked cotton wool.

2. Using the Gutta (or Sharpie), create the basic balloon shape.
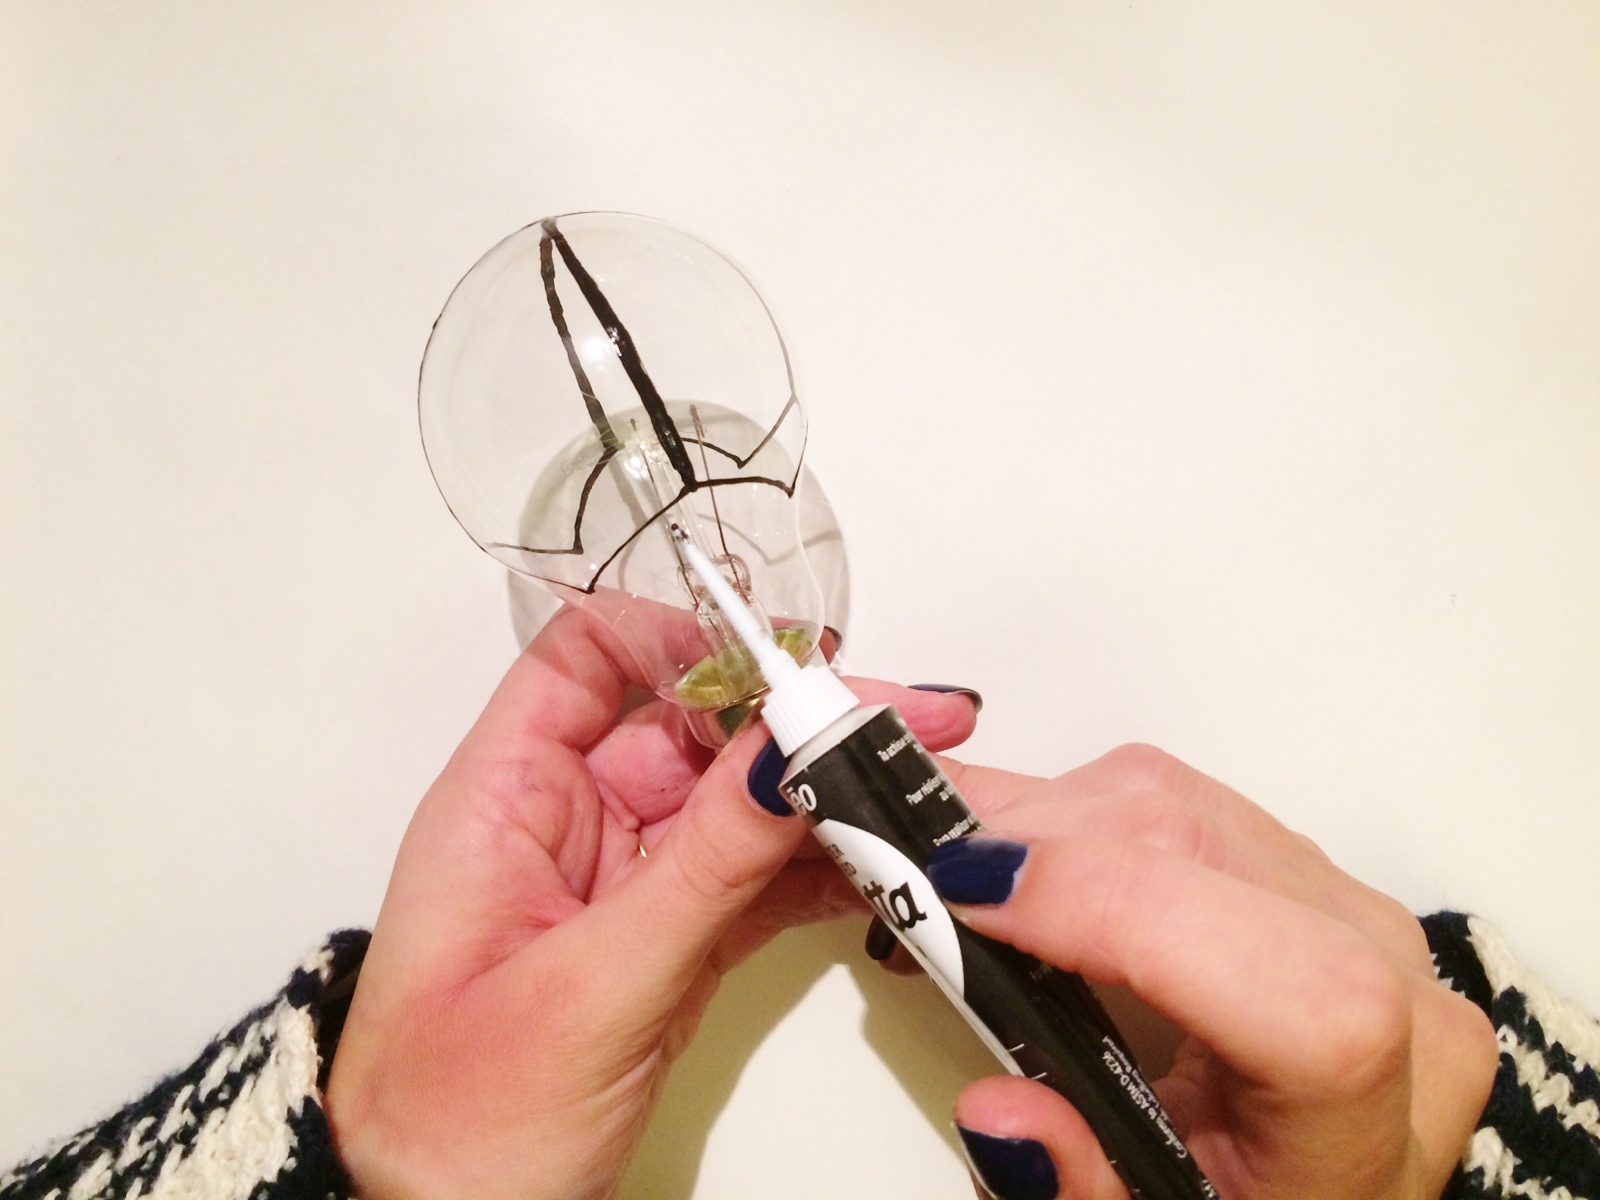
3. With your balloon shape defined, add some detail. For this light bulb, I went for a haphazard net effect.

I decided that the net alone was too much for one light bulb, so I added in some solid blocks of Gutta to balance it.

4. If using Gutta, leave to dry. I wedged my light bulbs into an upturned egg box to avoid smudging. I also found that directing a desk lamp towards the Gutta cured it quicker. At this point, you could use glass paint to colour the light bulbs (though if you use paint, you should use Gutta rather than Sharpies, since Gutta is designed to demarcate painting space) or add any embellishment. I decided that I didn’t like the exposed silver, so I wrapped some black grosgrain ribbon around the bottom and glued it into place.

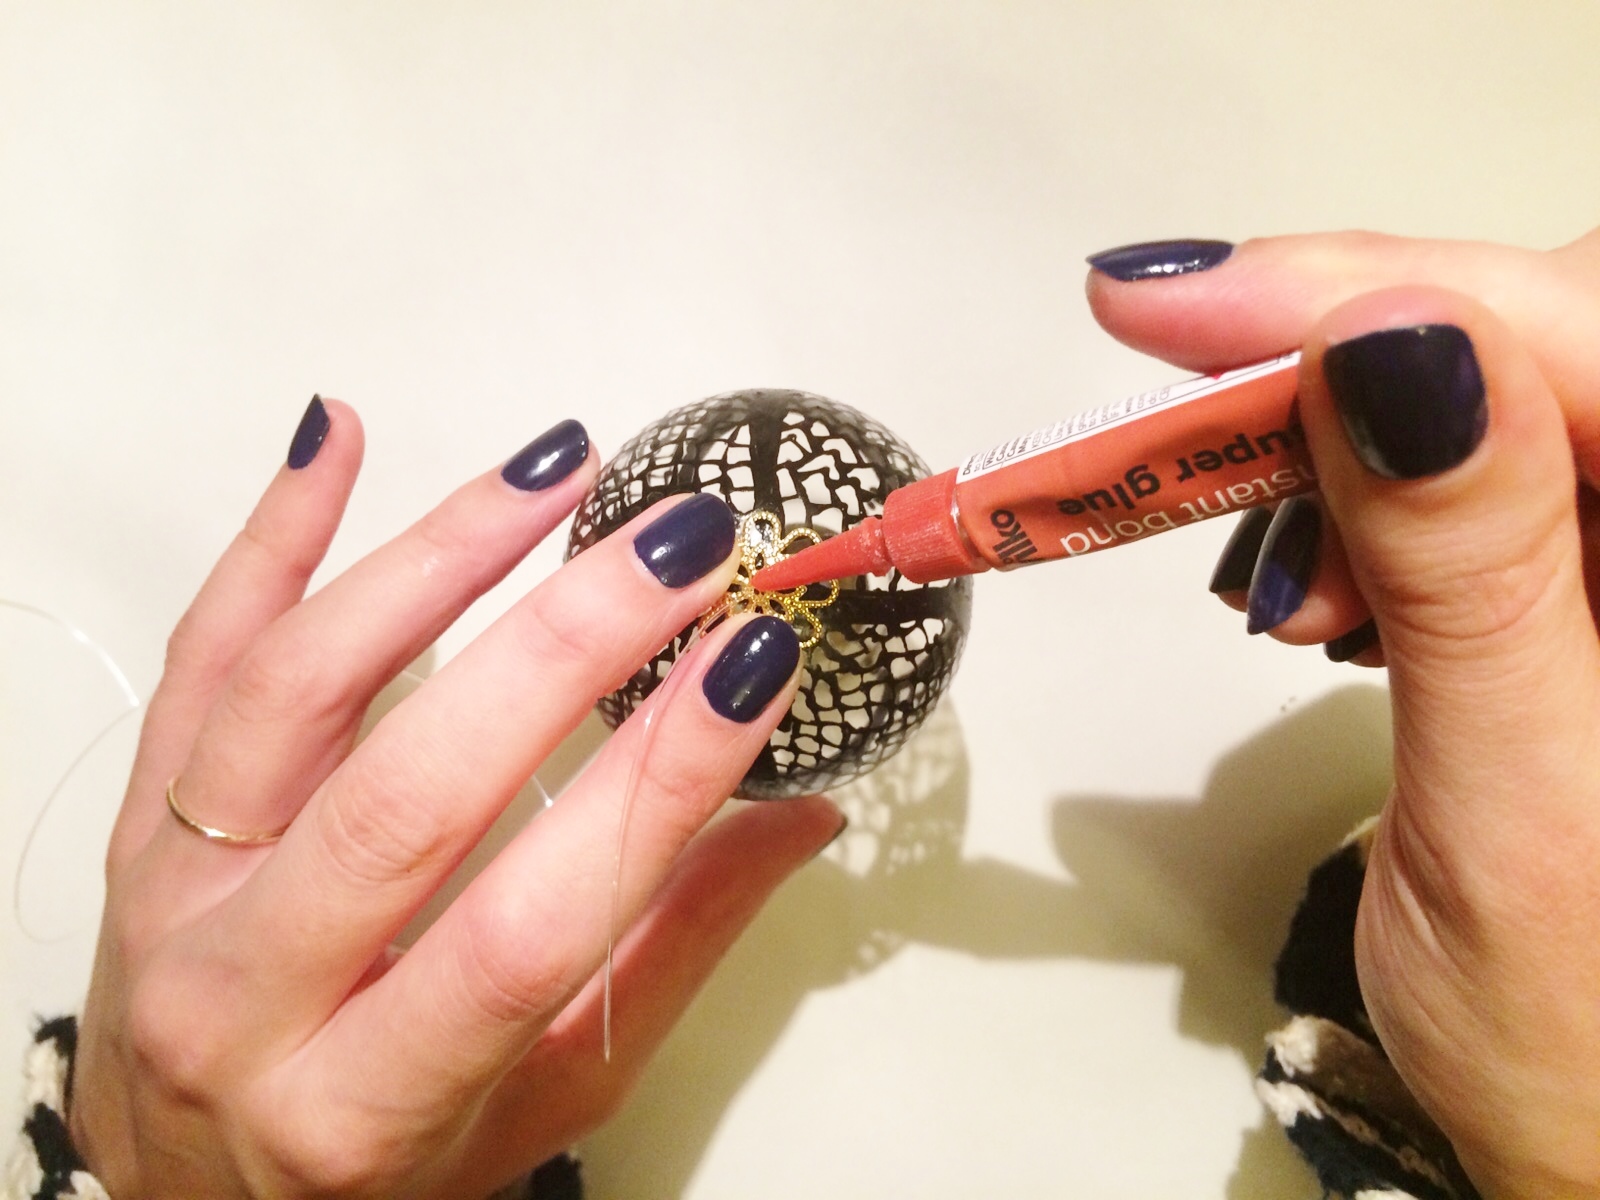
5. Flatten a bead cap, either manually, or by pressing it against a flat surface. It doesn’t need to be completely flat – in fact, some curvature is good, since this will be glued to the top of the light bulb.

6. Cut a long length of the fishing wire and pass it through the bead cap. Tie a knot on the underside. I found that weaving it through the filigree before knotting created a more secure hold.

7. Place a small amount of super glue on the top of the light bulb, and affix the bead cap.

8. To ensure a tight bond, I then applied glue onto the top of the affixed bead cap – this dripped through the filigree and reinforced the bond. (NB. Be really careful not to touch the super glue. I got it on my fingers and ended up sticking them together – prising them apart was not fun, nor was it pretty.)
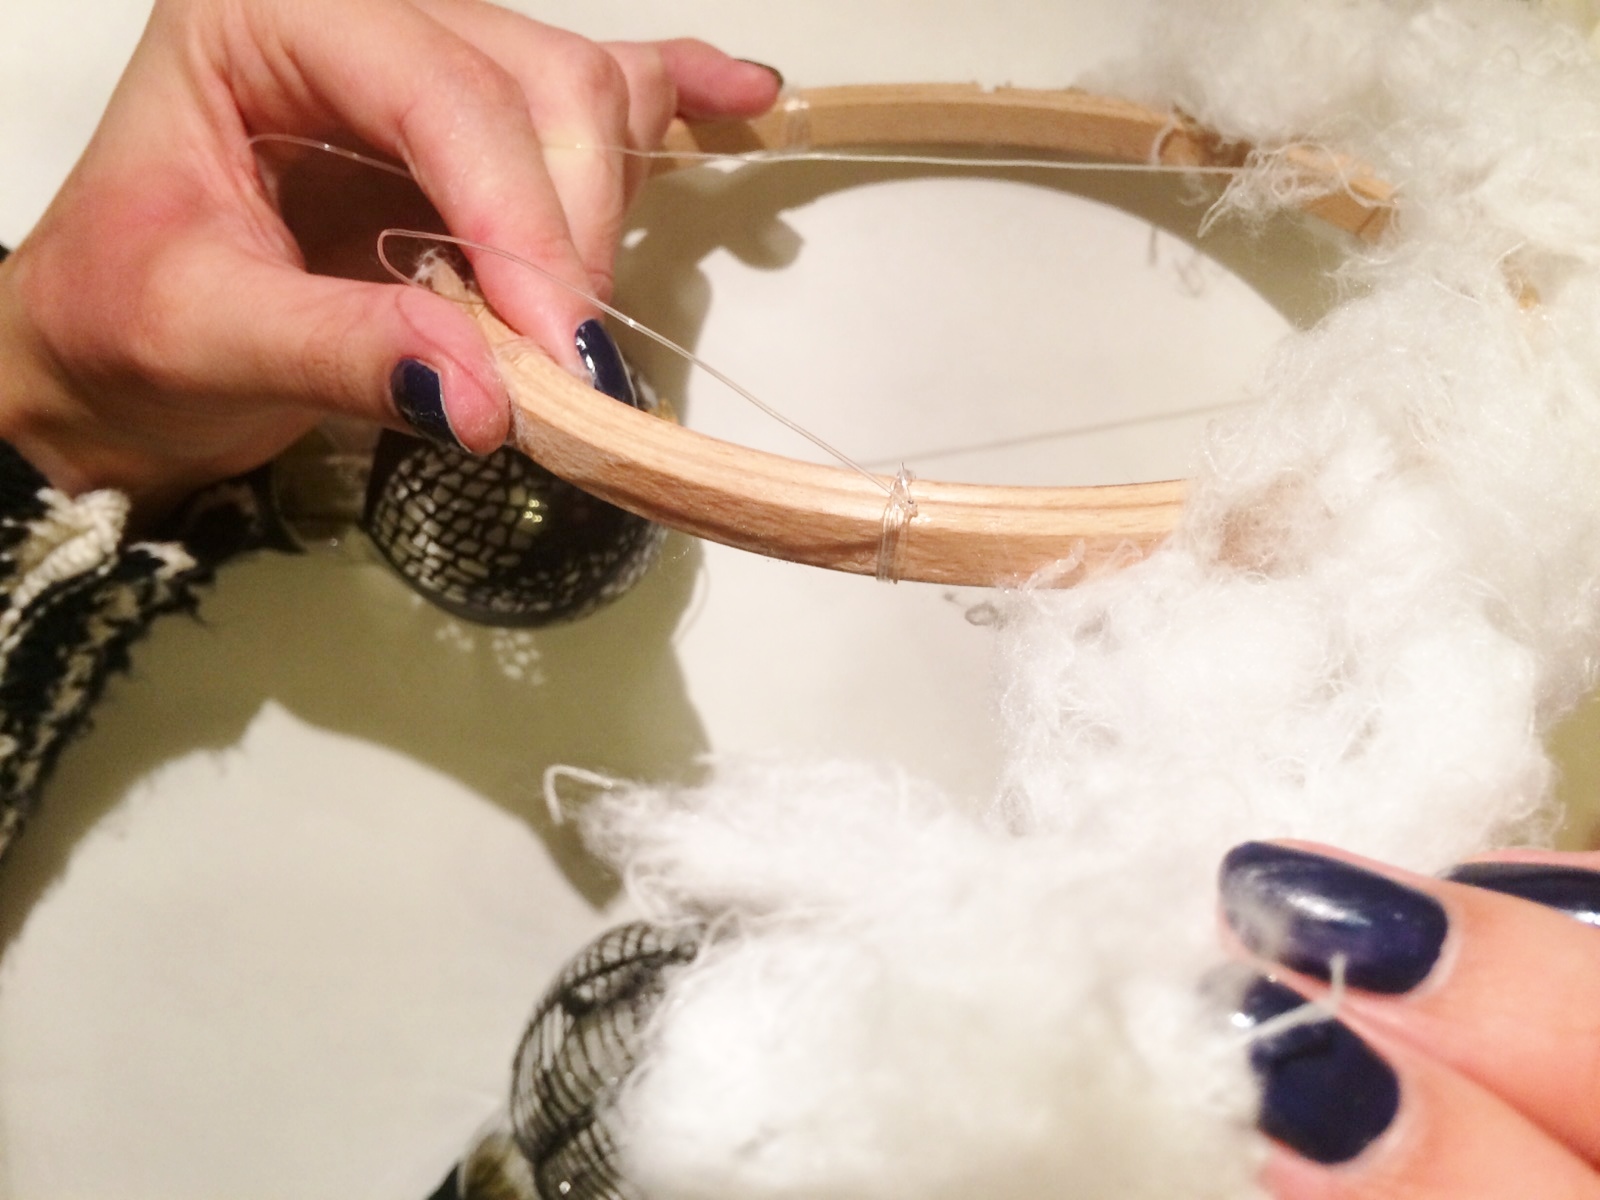
9. Take the opposite length of fishing wire and wrap it around the embroidery hoop several times before knotting.

10. Repeat steps 1-8 for your remaining light bulbs.
11. With your light bulbs now attached to the embroidery hoop, cut three long lengths of fishing wire. Wrap these around and knot onto the embroidery hoop at even intervals. Collect the three lengths of wire in the centre of the hoop and knot them together, so that you can hang your chandelier. Trim the excess.

12. Glue a small section of the outer edge of the embroidery hoop. Press small balls of polyester filling into the glue and repeat until the outer edge is sufficiently fluffy. Be careful to move the wires out of the way so you don’t glue them down accidentally. Repeat for the inner edge of the embroidery hoop. Trim any rogue threads of the polyester filling.
Once all the glue has dried, you can hang your chandelier – I used an upside down clear command hook to hang mine. Don’t hang the chandelier above your bed or any water source, just in case the chandelier should fall.


Enjoyed making this chandelier, however it was quite tricky sticking the clips onto the top of the light bulb. I ended up with more glue on my fingers than where it was supposed to be (despite the warnings). Not to be deterred, I managed to complete it and am pleased with the result 😊
LikeLike